

How to Attach New Drawer Fronts to Existing Drawer Boxes

If you're going to replace your cabinet doors, you might as well refresh your drawer fronts at the same time. Replacing drawer fronts alongside the cabinet doors will provide an enhanced, professional look without committing to a full at-home remodel. Replacement drawer fronts are a relatively low-cost upgrade that's easy to install.
In this article, we'll teach you how to attach drawer fronts properly so you can do it yourself without hiring professionals. Here's everything you need to know:
Understanding Drawer Front Replacement Basics
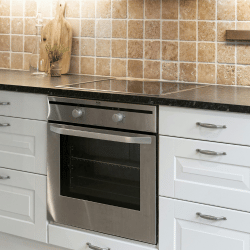
Investing in new, custom-made drawer front replacements is a common upgrade for kitchens and bathrooms. It's the most effective way to transform your space without committing to a full drawer replacement. A drawer front attachment is a seamless, easy process that doesn’t require any professional help or guidance.
However, before placing an order for replacements, inspect your current drawer fronts and drawers to check for any signs of irreparable damage. If there are minor cracks, severe sagging, or warping, the boxes may need to be replaced. If the drawer boxes are in good condition and don't show any major signs of wear and tear, you can attach replacement drawer fronts to the existing boxes instead.
How to Remove Your Old Drawer Fronts
Before ordering replacement drawer fronts, it's best to remove your old drawer fronts so you can take proper measurements of the drawer box openings. Here's a step-by-step guide to help you through the process:
- Locate and remove the screws on the inside of the drawer
- If you can't locate the screws, the drawer fronts might be glued or stapled instead
- Once the drawer fronts are removed, set the hardware aside for future use
- Inspect the drawer boxes for signs of damage
How to Measure for New Drawer Fronts
Once you've removed the drawer fronts from the existing boxes, take proper measurements of the drawer box opening, not the old drawer fronts. You'll want to measure the width and height of the opening in multiple spots to ensure accuracy. Once you have the measurements, you'll want to subtract 1/4" from the width and height to account for the reveal.
Avoiding Common Measurement Mistakes
Measuring is arguably the most important part of the process. If you don't get the right measurements, the drawer fronts you order might be too big or too small for the existing boxes. To ensure you get accurate measurements, you'll want to avoid the following common mistakes:
- Not accounting for the slide clearance
- Not checking the alignment of the existing boxes or checking for imperfections
- Forgetting to subtract from the width and height to account for the reveal
- Ignoring the hinge clearance
When you finally have accurate measurements, you can place an order for replacements in your desired wood species and style.
Step by Step: How to Attach Drawer Fronts to Drawer Boxes
Once your new replacement drawer fronts arrive, it's time to attach the drawer fronts to the boxes. Here's a step-by-step guide for attaching drawer fronts:
Step 1: Position the Drawer Front
The first step is to position the drawer front to the opening of the drawer box. The easiest way to do this is to use double-sided tape or clamps to keep the drawer front in place while you fix the alignment. You may need to reposition the doors and make adjustments until the reveals are even on both sides.
Step 2: Mark Your Screw Locations
Once the reveals are even and the drawer front is positioned correctly, mark the new screw hole locations on the inside of the drawer front. Most drawer boxes have pre-drilled holes, but if yours doesn't, you'll want to measure and mark where the screws should go. You'll also want to keep the clamps or tape in place to avoid movement.
Step 3: Drill Pilot Holes and Drive the Screw
Next, drill the pilot holes at the marked locations. If you drill holes in the wrong areas, it could cause the wood to split or get damaged. You'll also want to avoid drilling through the face of the drawer front. Once you have the new drill holes, attach the drawer front to the drawer box using screws.
Step 4: Final Alignment Check and Tighten
Before tightening the screws, check the alignment to ensure everything is exactly how you want it. Make adjustments to the positioning if needed, and then tighten the screws.
Common Mistakes to Avoid When Replacing Drawer Fronts
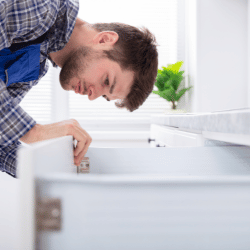
Replacing drawer fronts is relatively easy and typically doesn't require professional help. However, any mistake can damage the replacements or negatively impact the end result. Here's what you'll need to avoid:
- Forgetting to add pilot holes can cause the wood to split
- Measuring the drawer front instead of the cabinet opening can lead to inaccurate measurements
- Tightening the screws before checking the alignment
- Failing to account for the overlay in your measurements
Upgrading Drawer Fronts with Cabinet Door Factory
Are you looking for new custom-made drawer fronts? Cabinet Door Factory has you covered. We specialize in custom-made replacement drawer fronts and cabinet doors. We have an ever-growing collection of styles and wood species to choose from. Every drawer front is also part of a larger product family, so you can achieve a matching look.
Explore our collection of custom-made drawer fronts today.
FAQs
Can you reuse old drawer boxes with new drawer fronts?
If the current drawer boxes show no signs of wear and tear, you can invest in new drawer fronts rather than replacing the entire box.
How do you measure for replacement drawer fronts?
To get accurate measurements, measure the height and width of the drawer box opening. It's best to measure in multiple areas to confirm accuracy. Once you have your measurements, subtract 1/4" from the width and height to account for the reveal.
How do I keep the drawer front aligned while attaching it?
It's best to use double-sided tape or clamps to keep the drawer front in one place when attaching it to the cabinet drawer boxes.
